
Saved Forms and Documents
The Saved Forms (or Saved Forms & Documents) page allows the user to open and manipulate saved on-line forms, and upload and store other documents (if the Document Storage feature is enabled).
Folders
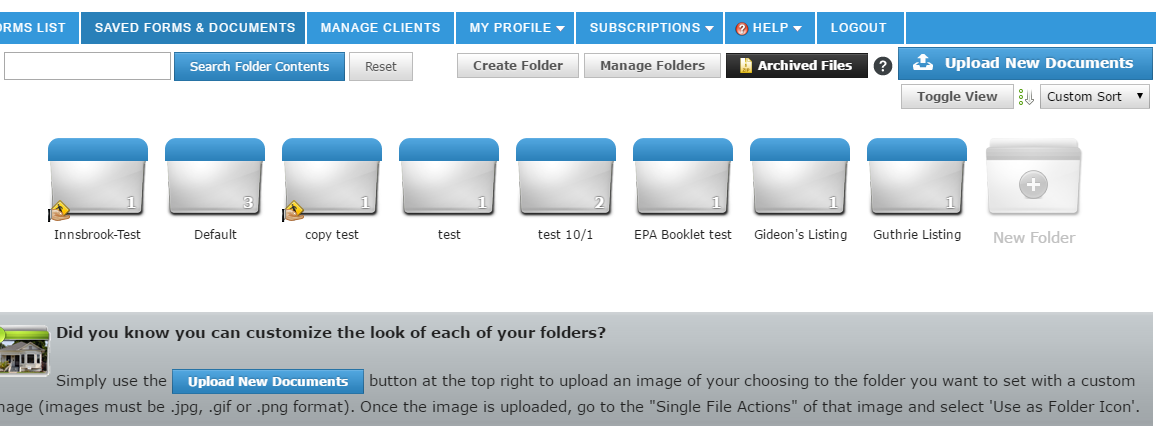
Saved forms and stored documents are arranged in folders. Folders can be opened to show the forms. 
You can also view the folders in a list by clicking on the Toggle View button.
Folders can be sorted 3 ways: Alphabetically, by Date, and Custom. You can be toggle between the 3 by selecting the one you want from the drop-down menu.

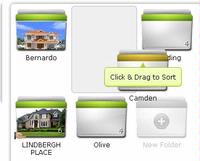
In the List view, in Custom mode, you can move the folders up or down by dragging on the Up/Down arrows on the right.
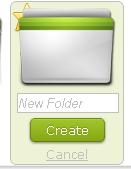
You can create a new folder by clicking on the New Folder icon. The new folder will have a place to enter a name. Once you have named the folder you can Create or Cancel. Once created, the folder can be used to upload documents and save forms.
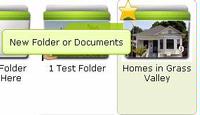
New folders, and folders with newly added files, can be identified by the star icon.
Search
You can search for specific form names using the Search feature.

Enter the word or words you want to search for and click Search Folder Contents. The results of the search will come up on a new page.
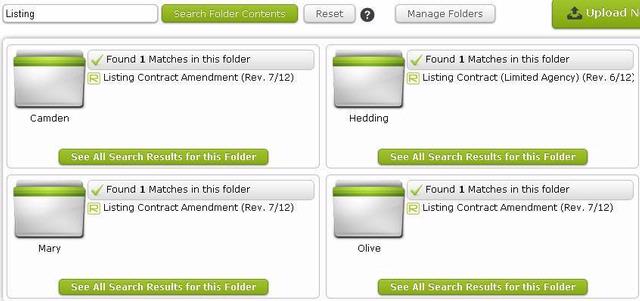
Clicking on the folder will open as normal. To return to the Saved Forms & Documents page without opening a folder, click on the Reset button.
Clicking on the Help button brings up a brief description of the Search system.
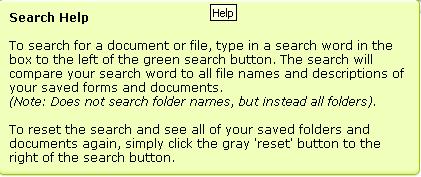
NOTE: The search doesn't search for folder names, just the documents in the folder.
Sharing Folders
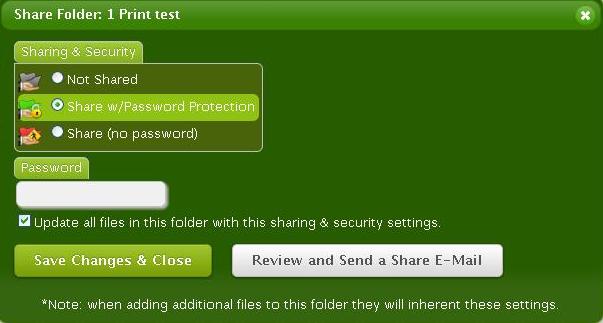
When the Share Folders button is clicked the Share Folder dialog comes up. The user can then email a link to the folder contents. The user will have the following choices:
1. Not Shared (the default setting) - The contents are not shared;
2. Share w/Password Protection - The content is shared and there is a password. Selecting this will show the password field and the Review and Send a Share E-Mail button;
3. Share (no password) - Only the Review and Send button with show.
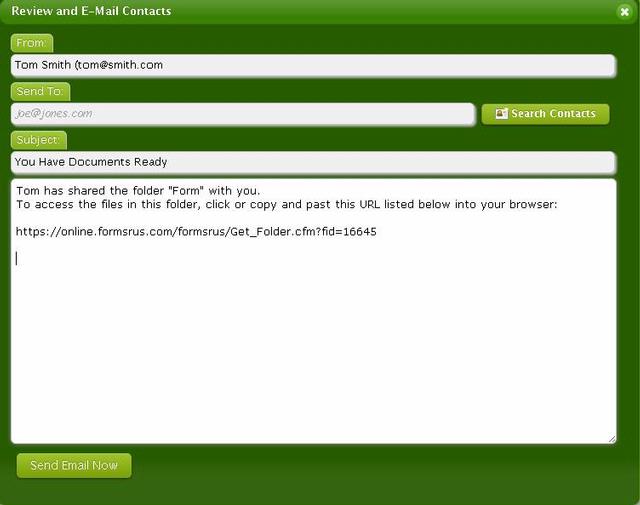
Clicking on the Review button will bring up the Review and Email dialog. The user's email from the User Profile will appear in the From field. There will be a default subject and standard email message with the link to the shared contents.
The user will have to enter the recipient's email address, and can change the subject and email message. (NOTE: Changing the link will result in the recipient not being able to access the folder.)
If Share w/Password Protection is selected, the password will be included in the email.
Managing Folders

Clicking on the Manage Folders button will bring up the Manage Folders page. From here, the user can:
1. delete empty folders. Folders that can be deleted will have the Delete button in red. (Folders must have 0 forms in them to be deleted);
2. move the folder to the top of the list;
3. move the folder up or down on the list;
4. rename the folder;
5. re-calculate the number of forms in the folder.
Forms and Documents

To close the folder and return to the list of folders, click on the Close Folder button
The check box on the far left selects the document and adds it to the Multiple File Action queue. You will see the number of files in the queue next to the Process Queue button. To remove all documents from the queue, click the Clear button.
Download
The Download button will download a copy of the document to your computer. If the document is one you uploaded it will be downloaded in whatever file format it was uploaded in.
If the document is a formsRus.com form or package, it will be downloaded as a read-only PDF.
Edit Detail
For a non-form document, clicking on the Edit Details button will bring up the Details page. The user can see the form name (but not change it) and:
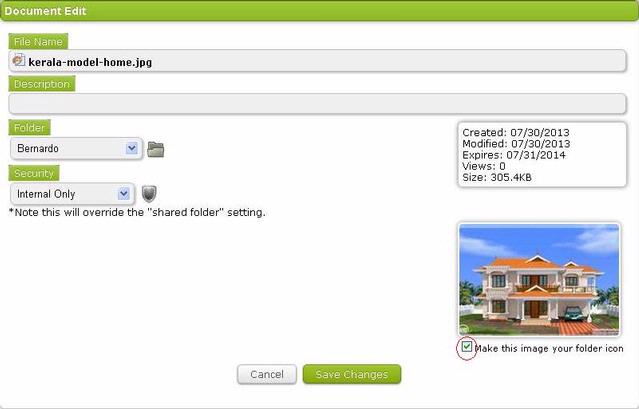
1. add a description of the document;
2. move the document to a different folder;
3. change the security of the document. The security levels are:

a. Internal Only - not shared by the outside world, but usable by the user when logged in. If the item is in a shared folder, it will not be visible to others. If the form had been emailed previously, changing to Internal only will prevent the recipient from accessing the form again;
b. Password Protected - if the file is emailed, the document will require a password to open;
c. Public (no password) - if the folder is shared or the form emailed, no password is required to open the document.
4. If the file is a graphic (.jpg or .png) file, you will see a thumbnail of the picture. You can make the picture an icon on the folder by checking "Make this image your folder icon". Only 1 image can be used as an icon at a time.
The security set will override the security set for a shared folder.
View PDF
This button allows you to view an uploaded PDF file in your browser without downloading it.
If the uploaded file isn't a PDF, this button will not appear
Edit/View
For formsRus.com forms and packages, clicking the Edit/View button will open the form and allow you to fill in, save, and print a form.
Copy & Replace
The Copy & Replace button will make a copy of the form and open up the Auto-fill page. You can then select what type of agent you are and then use a client to auto-fill the form, without changing any other filled in text. When you save the form, you will be asked if you want to rename it, and to select the folder to save it into. The copy will be saved, and the original form will not be affected.
This function is useful if you have a standard form which is always filled in the same. You can use it to change the client information without changing your standardized text.
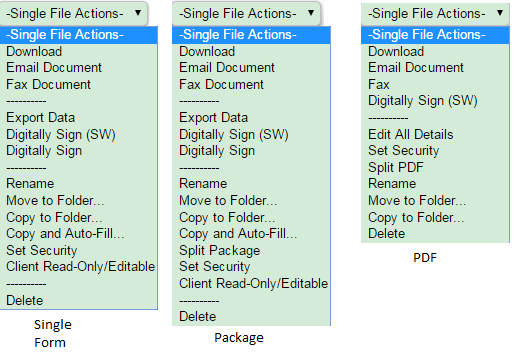
There are many actions that can be done to forms, including:
1. Download functions as the Download button
2. Email Document emails the form automatically from our system; How to Email a Form
3. Fax Document faxes the form; How to Fax a Form
4. Export Data exports the data on the form to a csv file. (Single Forms and Packages only) How to Export Data;
5. Digitally Sign (SW) takes the document into the Settleware Electronic Signing system, allowing you to have the form electronically signed.
6. Digitally Sign gives you the choice to sign the form through Inscrybe or Docusign (if these features are enabled). (Single Forms and Packages only) How to Digitally Sign Forms;
7. Rename allows you to change the name of the document. How to Rename a Form;
8. Copy to Folder allows you to copy the form to a different folder, leaving the original form in tact. How to Copy Forms;
9. Move to Folder moves a form from one folder to another. How to Move Forms;
10. Copy and Auto-Fill functions the same as the Copy & Replace button.
11. Set Security allows you to change the security of a form between Internal Only, Public, and Password Protected. This is useful if you emailed the form to someone and now want to disable their access to it;
12. Client Read-Only/Editable lets you change the way a client can handle an emailed form, whether they can change the filled in fields, or just open, read, and print the form. (Single Forms and Packages only);
13. Delete lets you delete the document. How to Delete the Form;
14. Split Package allows you to separate forms from the package. You will be given a list of forms from which you may select the forms you want to copy into a separate package. You will be able to select if you want the forms to be copied as individual forms or copied to a different package. You will be asked to give a new package name. You will also be give the chance to select the folder you want the new forms/package saved into. The forms will be copied to the selected folder. The original file will not be affected. (Packages Only);

16. Use as Folder Icon/Remove as Folder Icon lets you set a graphic file as the folder icon or remove it if it is the icon. The file will be shown on the folder in the Saved Forms and Documents page. (Graphic Files (jpg & png) Only).
The Multiple File Actions menu allows you to do some of the same functions to all selected files.
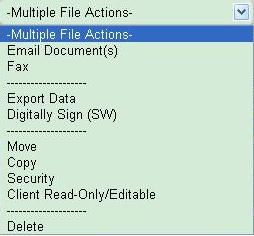
To perform an action on a number of items at the same time the items can be selected by checking the box to the left of the item description. Selected items are put in a Queue. Once the selected items are in the queue, the folder can be closes and another opened. Additional items can be added to the queue so that actions can be taken on items in several folders at the same time.

Once all the items have been selected, either clicking on the Process Queue button or using the Multiple File Actions menu will allow the user to take the desired actions.
Upload New Documents

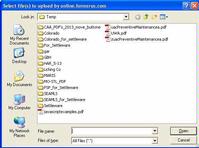
Clicking on the Upload New Documents button will bring up the dialog to select where to save an uploaded document and a button to bring up a navigation window where the user can select the document upload. You can also drag and drop files onto the indicated area.
After a certain amount of time, forms will be moved into the Archive. Usually this happens after 1 year, but can vary depending on the Association or owner of the portal.
To access the archive, click on the Archived Files button.

The Archive page looks similar to the Saved Forms page and can be sorted and viewed in the same way. When you open a folder from the archive you get the list of forms that are in the folder. The only options are to Download the form as a pdf, View the form, and Restore it to the Saved forms page.
